
13th Aug 2026
How to Measure Post Caps for a Proper Fit
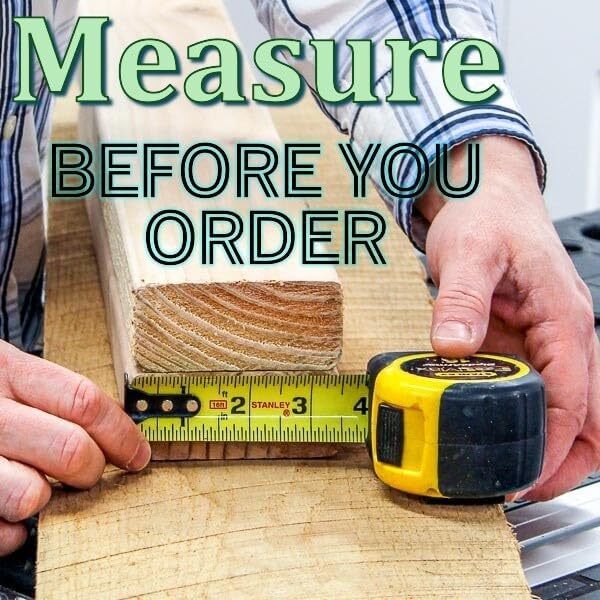 A post cap that looks just slightly too large can make a finished fence or deck feel unfinished. One that is too small simply will not install correctly. Knowing how to measure post caps before ordering prevents both problems and helps you get the protection and clean architectural finish your project deserves.
The key is simple: measure the actual outside dimensions of the post where the cap will sit. Do not order based only on the name stamped on the lumber or the size listed in your plans. A nominal 4x4 post, for example, is usually smaller than 4 inches by 4 inches after milling.
How to Measure Post Caps Correctly
Use a tape measure and measure across the top of the post from one outside edge to the opposite outside edge. Record both measurements, even when the post appears square. Wood posts can vary slightly, particularly after weather exposure, drying, staining, or field cuts.
For a square post, measure the width in two directions: left to right and front to back. For a rectangular post, such as a 4x6, measure the short side and the long side separately. Write the dimensions down in inches, including fractions. A measurement of 3 1/2 inches is different from 3 3/4 inches when you are selecting a cap designed to fit closely.
Measure at the very top of the post, where the cap will be installed. If the post has a rough edge, splintering, or an uneven cut, measure below the damaged area as well. This tells you whether the post needs to be trimmed square before installation. A cap can protect exposed end grain from rain, but it cannot correct a severely angled or cracked post top.
Measure the Post, Not the Old Cap
If you are replacing existing caps, remove one before measuring whenever possible. An old cap may have a different inside opening than the new style you want, and it may conceal swelling, rot, or an irregular post size.
Measuring the old cap is useful only as a secondary check. The post itself determines whether a new cap will fit properly. This is especially true when changing from a thin metal cap to a more substantial decorative cap, a flat-top style, or a ball-finial design.
Check More Than One Post
For a single mailbox post, gate post, or deck corner, one careful measurement may be enough. For a long fence line or a large deck, measure several posts before placing your order. Contractors know that lumber dimensions can vary between loads, and homeowners often find that replacement posts do not precisely match original posts.
Check at least one post from each group of material. Measure posts from different sections of the fence, older and newer posts, and any posts that were installed separately. If most posts are the same size but a few are different, order caps by the actual groups rather than forcing one size across the entire project.
Nominal Post Sizes vs. Actual Sizes
The most common measurement mistake comes from nominal lumber sizing. A post sold as a 4x4 is generally not a true 4 inches by 4 inches. It has usually been surfaced and milled to a smaller finished dimension.
In many projects, common actual wood-post dimensions are:
- A nominal 4x4 measures about 3 1/2 inches by 3 1/2 inches.
- A nominal 4x6 measures about 3 1/2 inches by 5 1/2 inches.
- A nominal 6x6 measures about 5 1/2 inches by 5 1/2 inches.
- A nominal 8x8 measures about 7 1/2 inches by 7 1/2 inches.
These dimensions are common, not automatic. Rough-sawn lumber, older posts, pressure-treated material, and posts from different mills may measure differently. That is why the tape measure should make the final call.
When shopping, look for the cap’s intended post size and, when provided, the inside opening or fit dimensions. The cap’s inside opening needs to accommodate the outside of your post. A cap is not sized by the width of its top surface or by the width of its decorative overhang.
Account for Shape, Material, and Post Condition
Not every post is standard dimensional lumber. Cedar posts, rough-cut timber, vinyl sleeves, composite-wrapped posts, and metal posts all require their own measurements. A post may be called a 4x4 but measure larger because of a sleeve, trim wrap, or decorative cladding.
For wrapped posts, measure the outermost finished surface, not the structural post hidden underneath. If a 4x4 wood post is covered by a sleeve that makes it 4 inches square, you need a cap that fits the 4-inch exterior dimension. The same rule applies to columns and built-up deck posts.
Pay close attention to posts that have weathered outdoors for years. End grain can split, corners can chip, and the top can become uneven. Before installing a new cap, remove loose wood fibers and make sure the surface is clean and reasonably level. If the post top is deeply cracked or soft from rot, address the underlying damage first. A new cap is a smart protective upgrade, but it should be installed on sound material.
Match the Cap Style to the Fit You Need
Once you know the post dimensions, choose a cap style that fits your project and installation preference. Some caps sit over the post with a visible skirt or overhang, while others have a slimmer profile. The visual difference matters, but so does how the cap engages the post.
A pyramid or pointed cap helps direct water away from the post top, making it a popular choice for fences and exposed gate posts. Flat-top caps offer a more tailored, contemporary appearance and can complement deck rail systems, pergolas, and clean-lined outdoor spaces. Decorative finials add height and character where a more traditional finish fits the property.
Material also affects the look and long-term maintenance expectations. Aluminum and other metal caps can bring a crisp accent to wood fencing and decking. Maintenance-free molded styles can offer consistent fit and color across a full project. The best choice depends on the conditions, the finish of the structure, and whether you want every cap to disappear into the design or become a visible finishing detail.
Atlanta Post Caps organizes options by common post dimensions first because sizing should never be an afterthought. After confirming the fit, you can choose the profile, color, and material that gives the project its finished look.
A Simple Measuring Process Before You Order
Start by gathering a tape measure, pencil, and phone or notepad. Measure the outside width and depth of each post type at its top. If the posts are supposed to be square, measure both directions anyway. Then compare your measurements with the cap’s stated fit information.
If your result lands between common sizes, do not guess. Recheck the post for a sleeve, buildup of paint, warped edges, or a measuring error. A cap should fit securely without requiring you to force it over the post or leave a distracting gap around the perimeter.
For projects with dozens of posts, make a quick count by size before ordering. Separate 4x4 fence posts from 6x6 gate or deck posts, and keep specialty posts in their own category. This small step helps avoid the frustrating situation of having one incorrect cap size interrupt an otherwise finished installation.
When a Post Is Not Perfectly Square
A slightly out-of-square post does not always require replacement. Measure the widest point near the top and select a cap that can accommodate that dimension according to its product specifications. Keep in mind that choosing too much extra room may leave an uneven reveal around the cap, especially on a prominent gate or front-yard fence.
If one corner is proud because of a rough cut, light sanding or trimming may solve the issue. If the entire post is twisted or badly oversized, a different cap size or a post repair may be the better answer. The cleanest installations begin with level, square post tops.
A careful measurement takes only a few minutes, yet it protects the investment you have made in your fence, deck, gate, or outdoor structure. Measure the actual post, verify the cap’s fit dimensions, and give each exposed post top the long-lasting style and protection it was built to have.