
Posted by Tim Settle on 28th Feb 2022
How a Few Extra Steps can Triple the Life of Your Fence Posts
How To Extend The Life Of Your Fence Posts
If you've ever set a fence post, you know it's something you don't want to tackle frequently. With a few thoughtful steps that don't require much extra time or effort, you can significantly extend the lifetime of your fence posts.
So the next time you're building a new wooden fence or replacing the fence posts on an old one, follow these steps to prepare and install fence posts that last decades.
The Weakest Link: Focus on the Vulnerable Points
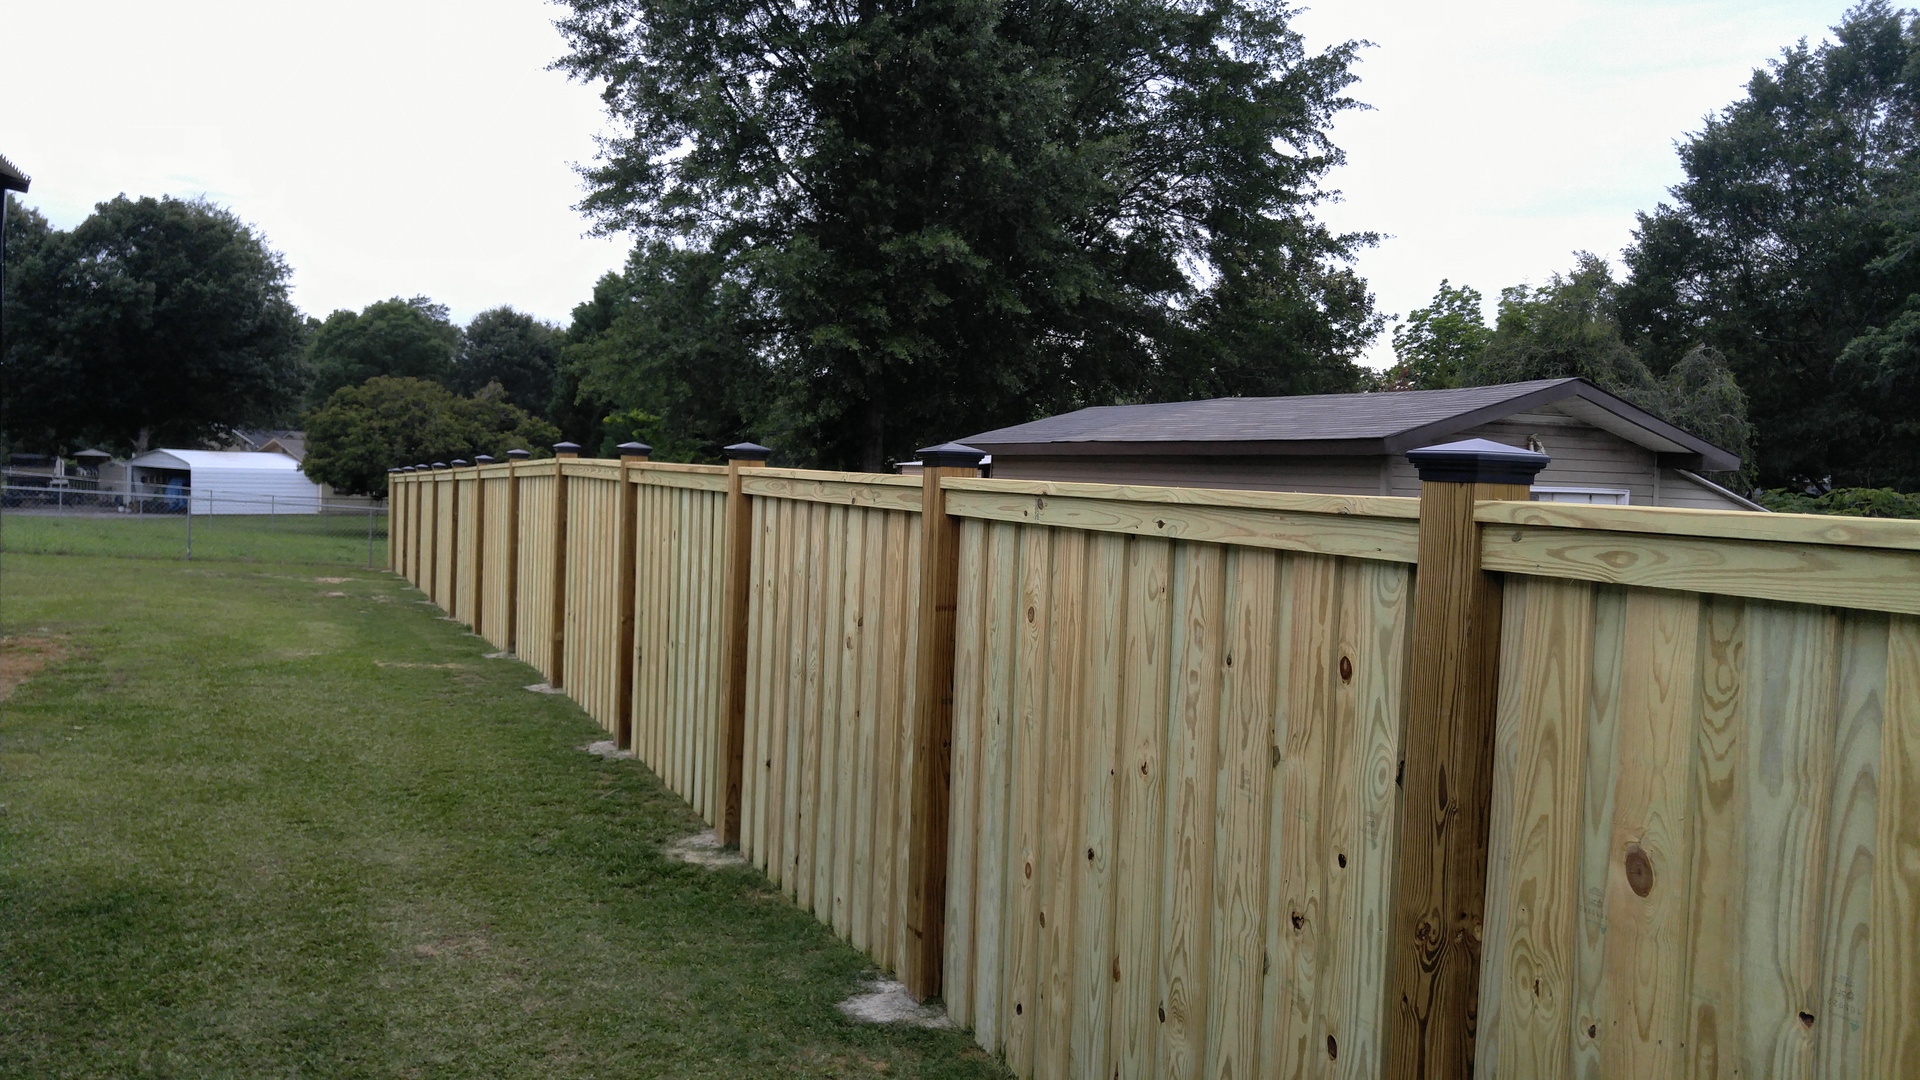
The top and bottom of each fence post are the most vulnerable to rot, so protection at these two ends should be your primary concern. Why? Because these are the most vulnerable points to water seepage. This seepage can result from any weather event, including rain, snow, and hail. Irrigation or sprinkler damage can also be the source of premature wood rot.
Slow the Wood Rot
The #1 key to extending the life of your fence posts is to slow the rotting process. Pressure-treating occurs at the lumber mill, where they use a special chemical treatment that makes the wood insect and water-resistant. While you may find that your fence posts are pressure-treated, that's only the beginning of what you should do to slow down the rotting process.
While a treated 4x4 may last 10 to 25 years, depending on the wood, the soil, and weather conditions, following the simple steps below could double or triple that number. By comparison, an untreated wood fence post may need replacing in as little as five years.
Make the Correct Wood Choice
First, consider the wood itself. Selecting a western red cedar or redwood, for instance, ensures that you start with a long-lasting, rot-resistant wood choice. Redwood, however, is the least eco-friendly option as it is sourced from old-growth forests that aren't as easy or quick to renew as cedar. No matter the wood, choose heartwood posts (the center part of a tree) instead of sapwood (the outer section of a tree). Heartwood is naturally denser and will be more insect-repellant.
Install Dry Posts
Secondly, make sure your wood fence posts are bone-dry before installation. For instance, if you're working from fresh or greenwood, the drying process takes months. The moisture inside the wood will accelerate rot on its own, plus it won't absorb as much of the wood preservative. You can use a wood moisture reader to ensure that your wood is dry before use.
Use Wood Preservative
Once your wood is dry, be prepared to brush the bottom half or third of the fence post with multiple coats of copper naphthenate, a wood preservative-free from chromium and arsenic. Let the wood dry for at least an hour in between each coating. Your goal is to continue to coat the wood until the wood preservative absorption ceases. At this point, you can stop the coatings and let the posts dry overnight. You can double-check the sealant by sprinkling some water on the post after drying. The water should bead up and remain on the surface. If it gets absorbed into the wood, you need to add more coats of wood preservatives.
Adding A Stain or Seal
On top of the wood preservative, you can add a water-repellant sealant to your fence posts to further mitigate water penetration and damage. You can even add a stain color to the sealant, which will also help protect the wood from discoloration.
Install Postsaver Sleeves
You can add a Postsaver sleeve to the fence post for added protection. This universal sleeve wraps quickly and easily around fence posts, being sealed with a blowtorch or air gun to protect the portion of the posts that sits at ground level.
Watch Where You Dig
Ensure you know where the underground cables are hiding before digging any holes. Always call 811 before you dig! Your utility service will come mark any relevant lines, saving yourself time and headache. Also, double-check your positioning, so you don't have to dig a hole twice.
Dig holes
Each fence post hole should be dug 2-3x the diameter of your fence post and 2-4 feet deep. The minimum depth for your fence post should be two feet. The goal is to bury 1/3 of the fence post in the ground. A portion of the treated fence post is to remain above ground. Burying 1/3 of the post will create the greatest stability for your fence posts and fence.
Consider the Regional Frost Line
Another consideration for the depth of your fence post holes is the frost line or frost depth in your area. This is the depth where the groundwater in the soil can freeze. The challenge of having posts above the frost-line is that frozen water expands 9% in volume, which can cause cracking and movement. Frost-lines vary from region to region, and the goal is to have your post sit below the frost line. The deepest frost line in the US is Alaska, at 100 inches, followed by Minnesota at 80 inches. Both Hawaii and Florida have zero-inch frost lines at the other end of the spectrum.
Fill with Gravel or Concrete
Fill the hole around your fence post with gravel or concrete, 2 to 3 inches above the ground. The choice is yours. Gravel helps keep moisture from the fence posts, slowing the rot. Concrete can more sturdily set the posts, but the moisture in the concrete may collect and absorb at the bottom of the post, accelerating the very process you're trying to mitigate. Adding gravel before pouring concrete will help with additional drainage. Make sure to trowel the top edge of the concrete and slope it downward from the posts so that the water flows away.
Seal the Gap
You can use specific caulking to seal the gap between the base of the fence post and the concrete. Look for an acrylic latex caulk explicitly designed for exterior usage or silicone-based caulking specially created to adhere to concrete.
Fence Post Caps Protect the Top
If left uncovered, the tops of fence posts are subject to water absorption. You can get fence post caps in a variety of sizes. The best ones are slightly oversized, allowing the wood to expand and contract naturally. Somewhat counterintuitively, having a tightly fitting fence post cap is counterproductive, as it can lead to trapped moisture beneath the cap—and a resulting wood rot acceleration. Shop our patented fence post caps.
A variety of Sizes
We offer many different fence post cap sizes. Each is built to fit just a touch loose (1/16 to 1/8 inch larger than your post width) to give your fence posts the breathing room it needs for natural expansion and contraction.
We offer:
4x4 post caps | 4x6 post caps | 6x6 post caps | 8x8 post caps
Maintenance to keep your fence posts from rotting
While you cannot control the weather, you can take steps to keep your fence posts in top shape. Keep your fence posts clean to prevent decay. Although you should limit the ongoing barrage of sprinklers, you can, upon occasion, clean your fence posts with a power washer to remove debris or even algae and mold. After power washing, you can use baking soda to provide a deeper cleaning and vinegar to kill algae and mold, which, if left untreated, will accelerate rot.
One and done
Dry, high-quality wood fence posts sealed with preservatives and sealants, placed in the ground securely below the frostline with fence post caps and well-drained concrete, and maintained to eliminate debris, can last a lifetime.